
Arthur Dent


尽信书,不如无书!
最近mojo进入我的视眼,因为官网宣传比python快68000倍。我抱着怀疑的态度,想尝试一下,毕竟最近领悟了“人生苦短,我用python”的理念。
第一时间订阅了mojo SDK的下载通知,在2023年9月7日迎来了第一版本的SDK下载,非常兴奋的去下载页面,都没有来得及仔细阅读,就把下载命令拷贝在终端,像rust语言一样的简单,可是报错了,发现这个版本的SDK只支持在Ubuntu上运行,被搞得难受极了,心了有了无数匹马在奔腾。好吧,既然这样就仔细遇到阅读了安装手册,说可以使用docker来弥补现在的这个版本,好吧,既然这样就安装docker了。可是,万万没有想到,docker居然会出现那么严重的问题,我的主盘128G空间剩余20G,连个docker都安装不了,赶紧腾出了30G的趋势卡来安装,docker这个混蛋居然把所有空间占满了,还启动报错,F**K。连续安装了几次后,果断放弃了。看着mojo的文档说马上会推出macOS的SDK,心想就这样吧~~
2023年9月21日,mojo推出了v0.3.0版本,我认真仔细的读了变更日志,没有推出macOS的SDK,心里不爽,不是说coming soon吗?好吧,我等不了了,既然docker用不了,那有没有替代品呢?找到了podman。我是来安装mojo的,想不到吧?我去安装了podman来安装Ubuntu了,呵呵。看了podman的介绍,还好和docker比较相似,用法上没有太多的难点。
brew install podman
podman machine init
podman machine start
podman search docker.io/ubuntu
podman run -it docker.io/library/ubuntu
podman machine ssh
更多详细操作请查看podman官网。
进入到podman的镜像中,ubuntu是最精简版连个curl命令都木有,所以直接用文档命令是会报错的,第一步应该是安装curl。
apt update && apt install curl
有个认证信息是在用自己的邮箱登录modular.com是匹配的,下载SDK需要进行验证,或许是为了看看有多少人来用,也或者就是个噱头。
curl https://get.modular.com | \
  MODULAR_AUTH=mut_00273df6e12046e2827eec99ee37131e \
  sh -
安装modular还算好,一次安装成功,记住这里的一次,后面有惊喜。
modular install mojo
我花了一天的时间来允许这个命令,尝试次数不低于20次,F**K。终于受不了,去known-issues看看到底是啥情况呀,一看不知道,看了吓一跳,出现各种问题的不至我一个,他们都在try and try again。我无语了,我可以忍受我的电脑在低声咆哮,毕竟老啦,但是我即使使用Rust编译,Idea的编译器都是咆哮一会就好,好吧,你给我一直咆哮也就算啦,还报啦许多错误。
让我难以忘怀的命令是这个:
modular: error: failure detected - please run `modular clean` and try again
看到try again了吧,好不容易用VPN把一些东西下载下来,因为某几个没有下载好,那就再来一次呗。
让我们看看这个报了哪些错误:
==========================
Failure Information:
	- http error: failed to reach URL https://cas.modular.com/0/bMhzPD9Lch93-cq37AFHNKVX1jLZsPC4GyvDS94CLoY with cURL error Failure when receiving data from the peer - Looking for bMhzPD9Lch93-cq37AFHNKVX1jLZsPC4GyvDS94CLoY
	- http error: failed to reach URL https://cas.modular.com/0/BJQxbJ7r1e1hCtY-5drp4KPW-MeoBkBY3LmSRHBhMek with cURL error Failure when receiving data from the peer - Looking for BJQxbJ7r1e1hCtY-5drp4KPW-MeoBkBY3LmSRHBhMek
	- http error: failed to reach URL https://cas.modular.com/0/r7Uh_7YudP025MOQM_uMTbA5iOdIlKqnoXgfywB20_Y with cURL error Failure when receiving data from the peer - Looking for r7Uh_7YudP025MOQM_uMTbA5iOdIlKqnoXgfywB20_Y
==========================
这个错误还是可以理解的,怪自己的VPN不稳定,是吧!
==========================
Failure Information:
	- http error: failed to reach URL https://cas.modular.com/0/bMhzPD9Lch93-cq37AFHNKVX1jLZsPC4GyvDS94CLoY with cURL error Failure when receiving data from the peer - Looking for bMhzPD9Lch93-cq37AFHNKVX1jLZsPC4GyvDS94CLoY
	- Creating symlink for /root/.modular/pkg/packages.modular.com_mojo/lib/liblldb.so.18.0.0git -> /root/.modular/pkg/packages.modular.com_mojo/lib/liblldb.so failed: File exists
	- Creating symlink for /root/.modular/pkg/packages.modular.com_mojo/lib/libMojoJupyter.so.18git -> /root/.modular/pkg/packages.modular.com_mojo/lib/libMojoJupyter.so failed: File exists
	- Creating symlink for /root/.modular/pkg/packages.modular.com_mojo/lib/liblldb.so.18.0.0git -> /root/.modular/pkg/packages.modular.com_mojo/lib/liblldb.so.18git failed: File exists
	- Creating symlink for /root/.modular/pkg/packages.modular.com_mojo/lib/libKGENCompilerRTShared.so.18git -> /root/.modular/pkg/packages.modular.com_mojo/lib/libKGENCompilerRTShared.so failed: File exists
	- Creating symlink for /root/.modular/pkg/packages.modular.com_mojo/lib/libMojoLLDB.so.18git -> /root/.modular/pkg/packages.modular.com_mojo/lib/libMojoLLDB.so failed: File exists
	- Creating symlink for /root/.modular/pkg/packages.modular.com_mojo/lib/libLLCLRuntimeGlobals.so.18git -> /root/.modular/pkg/packages.modular.com_mojo/lib/libLLCLRuntimeGlobals.so failed: File exists
	- Creating symlink for /root/.modular/pkg/packages.modular.com_mojo/lib/libMSupportGlobals.so.18git -> /root/.modular/pkg/packages.modular.com_mojo/lib/libMSupportGlobals.so failed: File exists
	- http error: failed to reach URL https://cas.modular.com/0/r7Uh_7YudP025MOQM_uMTbA5iOdIlKqnoXgfywB20_Y with cURL error Failure when receiving data from the peer - Looking for r7Uh_7YudP025MOQM_uMTbA5iOdIlKqnoXgfywB20_Y
==========================
下载了那么久你告诉我没有使用 modular clean是吧,每次都要从头开始是吧?
== stderr ==
/root/.modular/pkg/packages.modular.com_mojo/bin/lldb: error while loading shared libraries: libedit.so.2: cannot open shared object file: No such file or directory

TEST: `mojo repl`... ERROR
Traceback (most recent call last):
  File "/root/.modular/pkg/packages.modular.com_mojo/scripts/post-install/self-test.py", line 378, in <module>
    main()
  File "/root/.modular/pkg/packages.modular.com_mojo/scripts/post-install/self-test.py", line 374, in main
    tester.test(args.test_jupyter)
  File "/root/.modular/pkg/packages.modular.com_mojo/scripts/post-install/self-test.py", line 311, in test
    self.test_mojo_repl()
  File "/root/.modular/pkg/packages.modular.com_mojo/scripts/post-install/self-test.py", line 195, in test_mojo_repl
    assert False
AssertionError
modular: error: failed to run python:
到这里已经让我欣喜若狂啦,因为就是已经提示了大部分的mojo已经可以用啦
Testing `MODULAR_HOME=/root/.modular`
* `/root/.modular/pkg/packages.modular.com_mojo/bin/mojo`...
TEST: `mojo --help`... OK
TEST: `mojo run --help`... OK
TEST: `mojo build test_mandelbrot.mojo`... OK
TEST: `mojo build test_python.mojo`... OK
TEST: `mojo demangle`... OK
TEST: `mojo format`... OK
TEST: `mojo package`... OK
TEST: `mojo test_mandelbrot.mojo`... OK
TEST: `mojo test_python.mojo`... OK
这个错误是啥呢?是Ubuntu没有libedit2,这个好解决,绝对不modular clean了,毕竟太耗时,耗精力了。
apt install libedit2
问题搞定,然后尝试使用mojo的时候发现还有个配置要设置:
echo 'export MODULAR_HOME="$HOME/.modular"' >> ~/.bashrc

echo 'export PATH="$MODULAR_HOME/pkg/packages.modular.com_mojo/bin:$PATH"' >> ~/.bashrc

source ~/.bashrc
好啦,可以开心的玩一会啦,毕竟还要设置镜像的ssh登录到vscode上。
podman和docker的区别在于podman还需要自己创建一个容器,我们就称为根容器吧。网络配置上需要进行一定的转换,才可以真正的使用Ubuntu容器。
apt install openssh-server
service ssh start
service ssh status
netstat -tuln|grep 22
apt-get install -y net-tools
apt install iptables
注意:安装的时候启动容器一定要加入–cap-add=NET_ADMIN选项,不然会报错
iptables v1.8.7 (nf_tables): Could not fetch rule set generation id: Permission denied (you must be root)
添加让ssh通行规则:
iptables -A INPUT -p tcp --dport 22 -j ACCEPT
apt install vim
安装vim的目的主要就是为了修改ssh配置。
vim /etc/ssh/sshd_config
添加一行让root可以登录的信息
PermitRootLogin yes
至此,容器配置完成,可以进行提交啦。
podman commit containerID
podman run -itd --name=mojo-dev --cap-add=NET_ADMIN -p 5000:22 5a4d4ff6c70a /bin/bash
这个操作在本机中执行,目的就是让本机可以正常的使用ssh访问到容器中。
sudo route add -net 10.88.0.0 -netmask 255.255.255.0 192.168.127.1
点击vscode左下脚的Open a Remote Window,选择Connect to Host…,添加一个 Add New SSH Host…,输入:
ssh root@localhost -p 5000
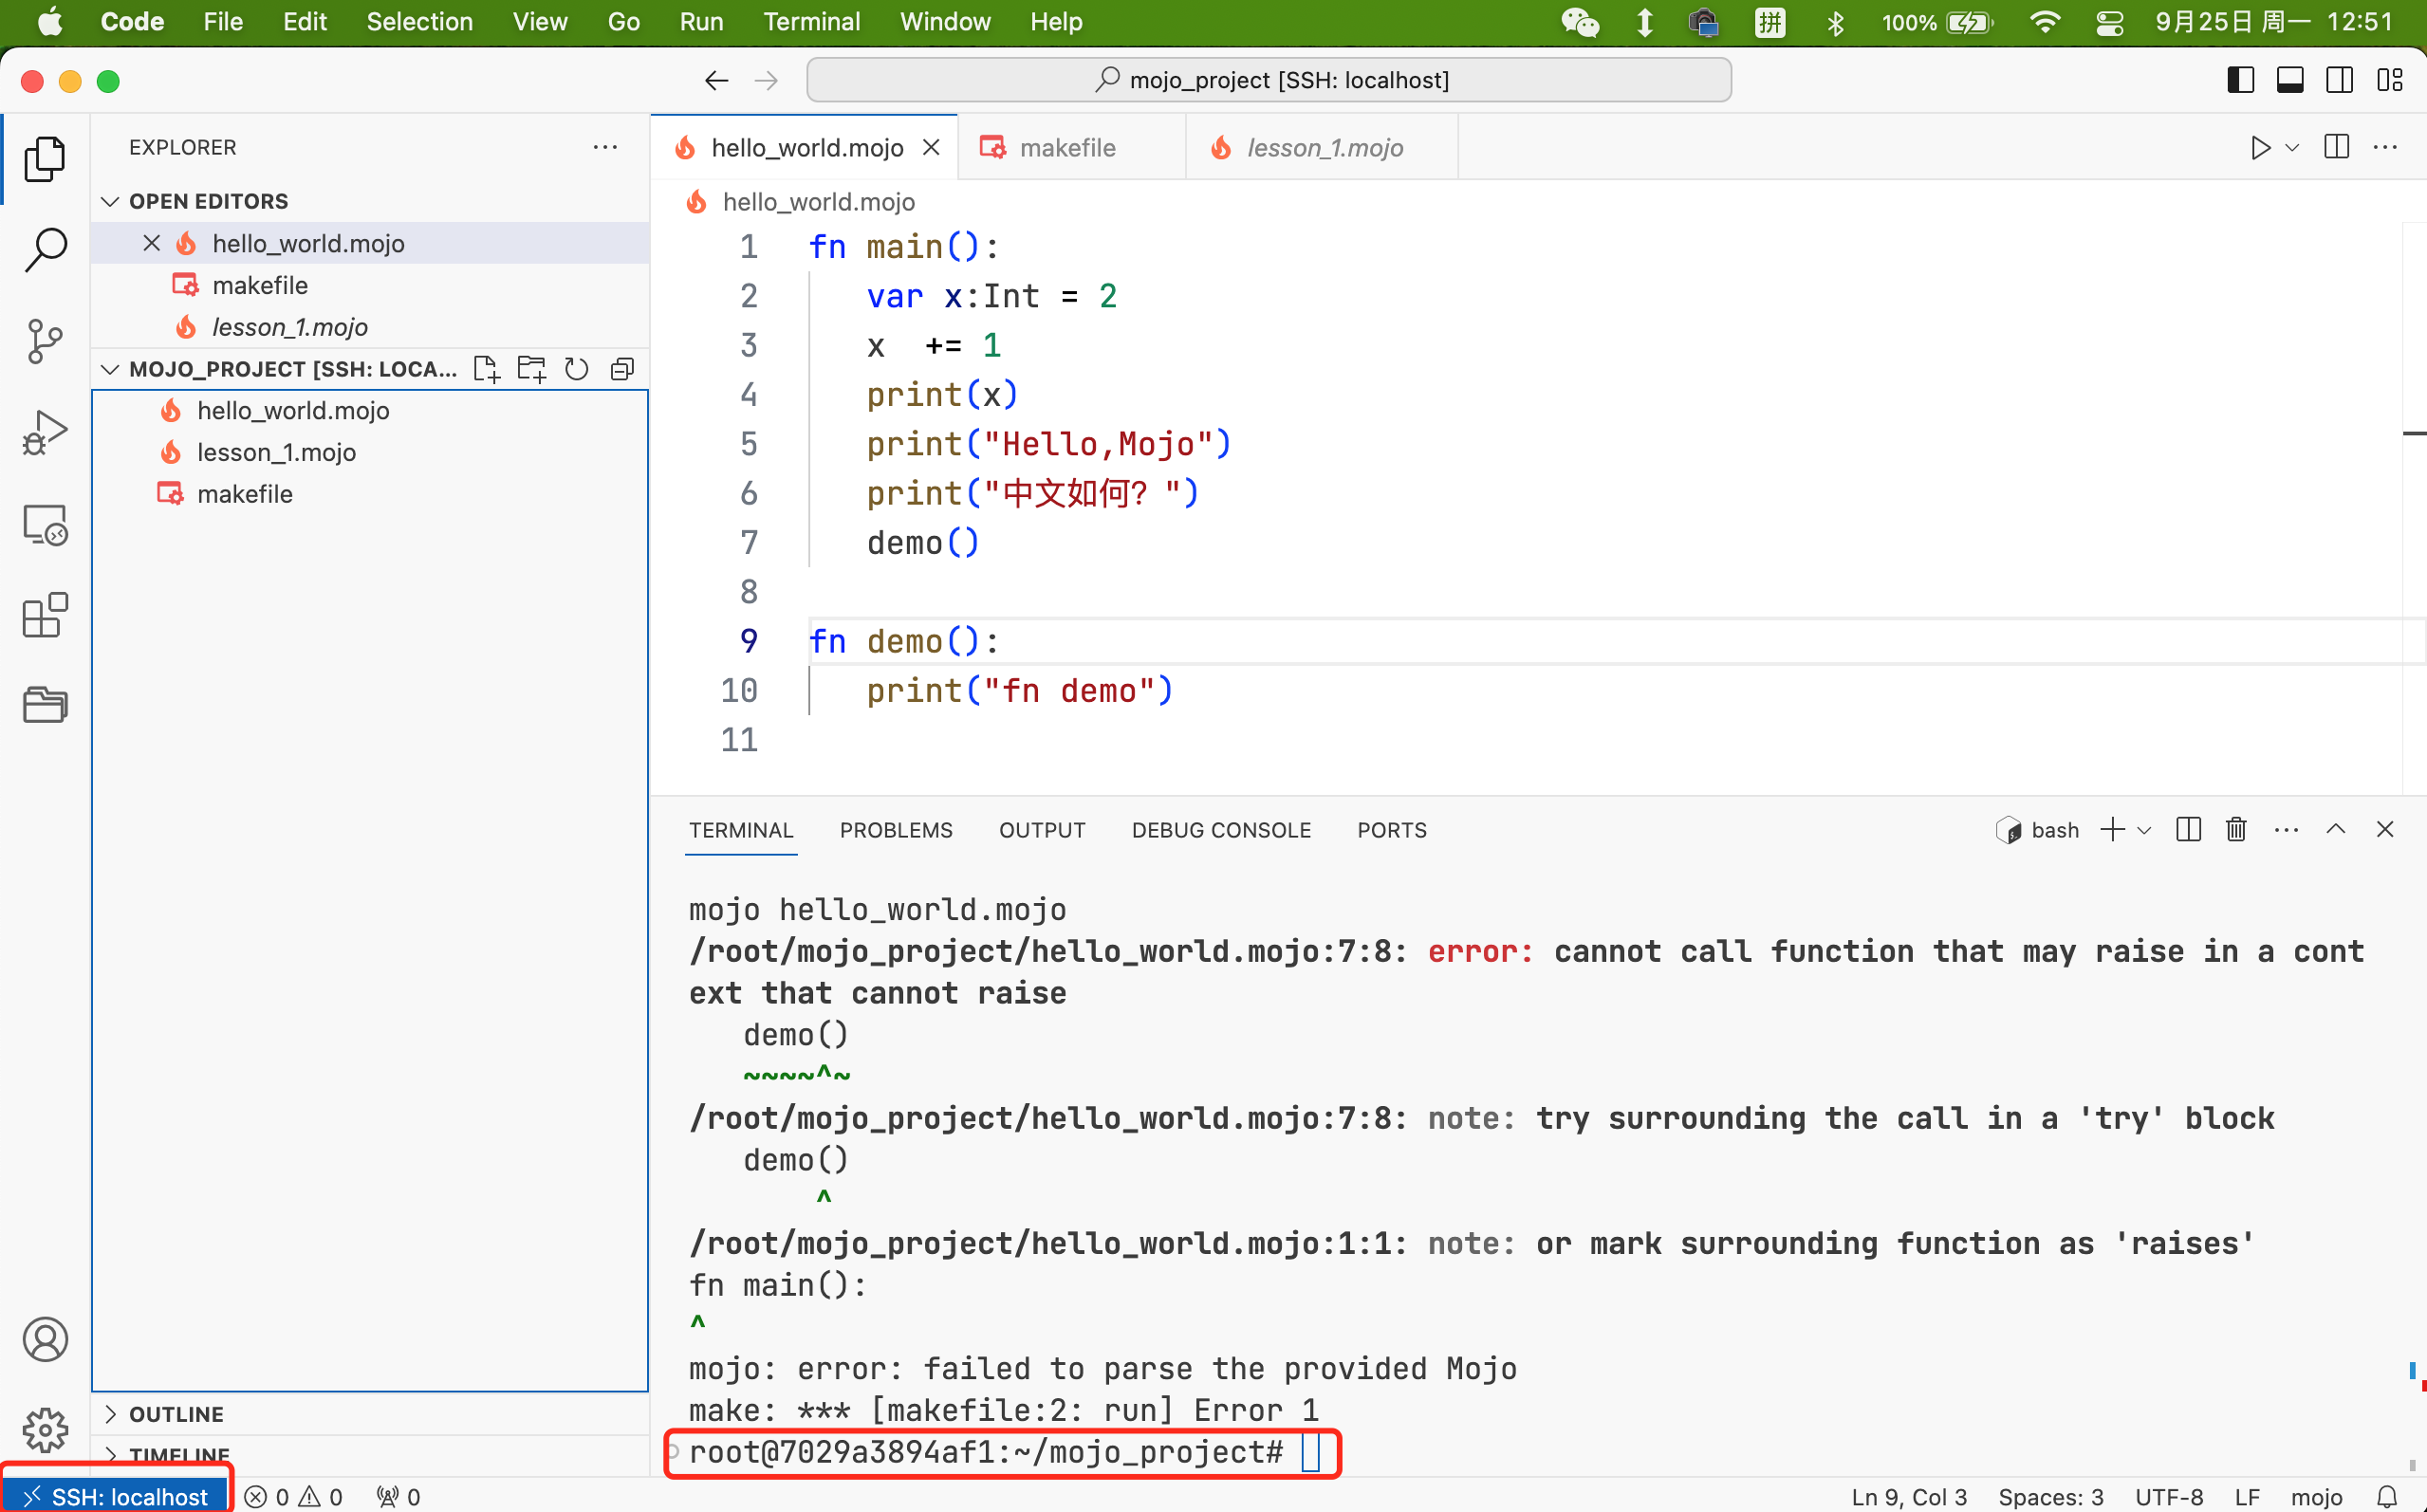
然后,就可以开心的code mojo啦~~
还是因为电脑的问题,不得不重新配置podman的qcow2文件路径,毕竟随便一用就达到了10G,所以呢就想把qcow2文件挪一下位置。
1.编辑 ~/.config/containers/podman-machine-default.json中包含qcow2的位置。
2.修改为需要挪动的位置。